

Yarn
Install Guide by YARN
Prerequisites
Before installing AesirX BI, you must have the following installed on your development computer:
- Install GIT. Download at https://git-scm.com/downloads
- Download and install the node framework. Click on the URL https://nodejs.org/en/download/ and select a platform.
You also must have installed 1st party server for AesirX Analytics:
git clone https://github.com/aesirxio/analytics-1stparty.git
Instructions for setting up:
- Clone the aesirx-1stparty.env.dist file into aesirx-1stparty.env and customize
- You can choose not to customize anything.
- If you have a separate MongoDB server, you can specify the credentials using the following variables:
- DBUSER
- DBPASS
- DBHOST
- DBPORT
- DBNAME
- You can choose to change the HTTP_PORT variable (default 80), which is the port that your 1st party server will listen to.
- Execute docker-compose up -d to run the full setup, including the MongoDB server.
Step-by-step guide:
1. Register your account at https://bi.aesirx.io/. You will then get an email for a user creation account.
2. Activate your account by clicking verify in the email.
3. Login to https://bi.aesirx.io/ site to get the SSO_CLIENT_ID and SSO_CLIENT_SECRECT in your profile.


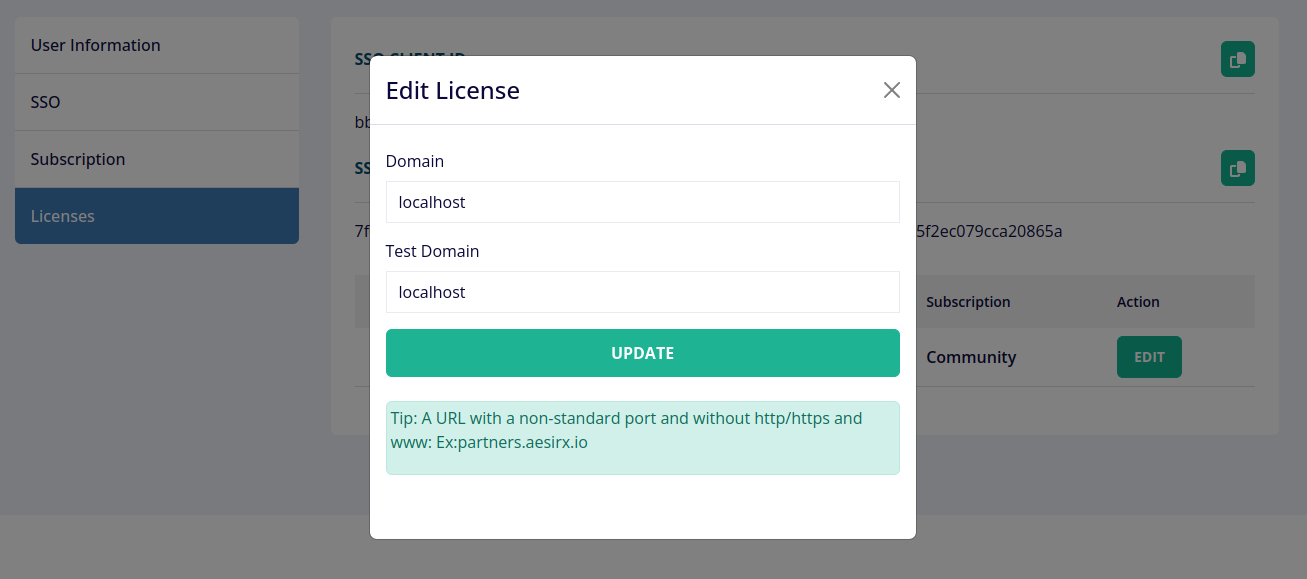
4. Enter the domain and test the domain of the license. For example:

5. Install the BI app.
git clone
https://github.com/aesirxio/bi-app
6. At the bi-app folder, rename the .env.dist file to .env
Or use this command:
mv .env.dist .env
- Note: To show the .env file on your computer, use:
- MacOS: Ctrl + Shift + "."
- Linux: Ctrl + H
7. Replace the REACT_APP_CLIENT_SECRET and REACT_APP_LICENSE in the .env file with the one provided in your profile account.
8. Replace the REACT_APP_ENDPOINT_URL in the .env file with the link to your 1st party server for AesirX Analytics.
9. Replace the REACT_APP_DATA_STREAM in the .env file with the name and domain to the your data-stream endpoint.
10. Replace the REACT_APP_DEMO_USER in the .env file with the email you want to set for Login.
11. Replace the REACT_APP_DEMO_PASSWORD in the .env file with the password you want to set for Login.
12. Then run BI app.
yarn install
yarn build
When the app runs successfully, it will look like the image below

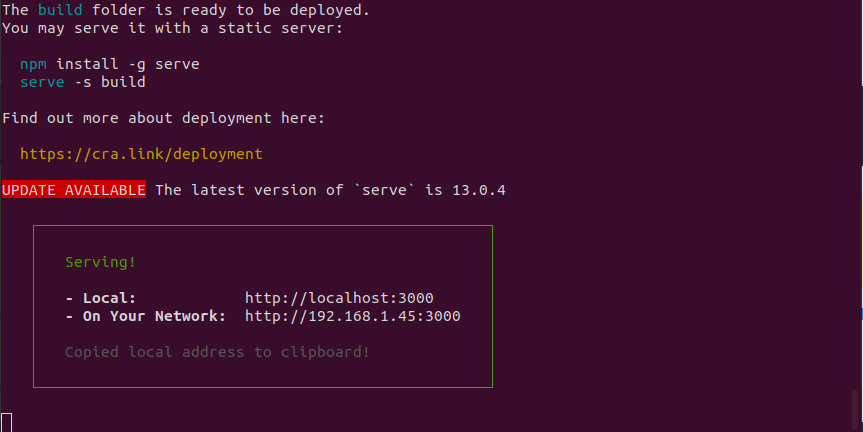
13. Go to the browser, and type the name http://localhost:3000 to log in.
Enjoyed this read? Share the blog!


The evolution of Aesir is Aesir + (the Norse symbol for Necessity)"Needed in order to achieve a particular result"

